How to remove a Mercedes C-Class car stereo – (W203 Shape)

  MERCEDES (6 Guides)

How to remove a Mercedes C-Class car stereo - (W203 Shape)

The following is a guide on removing a car stereo or car radio from the above vehicle.

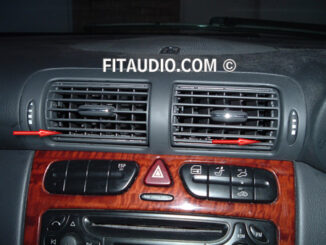
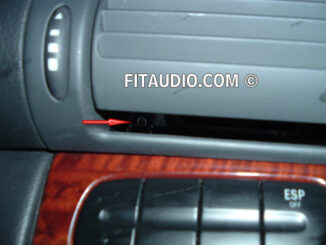
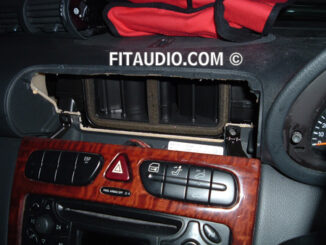
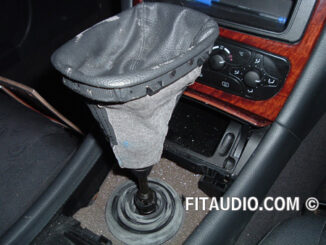
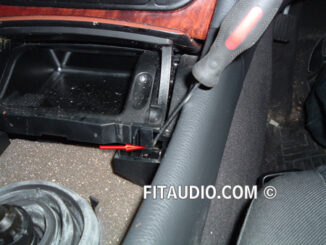
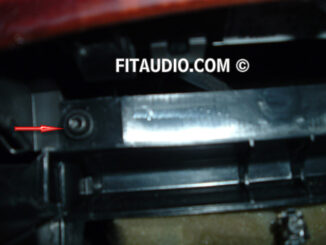
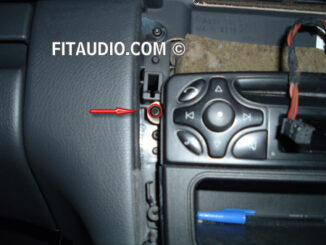
Tools and equipment required to complete the job

  • Screwdriver Set
  • Trim Removal Tools
  • Torx Screwdrivers

Original Stereo Image for this Vehicle:

h1

How to remove the stereo step by step:

h2

Using a flat headed screwdriver, push the lower air vent tab to the right whilst spinning the air vent upwards. This should allow for access in the gap at the bottom.

2
h3

Once you have done this, you need to undo the two TORX screws on each air vent.  (One under each vent)

3
h4

Now spin the airvents to the bottom (still facing right) which should create another gap. With a flat headed screwdriver, you should be able to see some plastic tabs.
Push these down whilst pulling the air vent towards you to release it.  Do this on both sides.

4
h5

Now remove the trim around the gear stick and pull up the gator. 

5
h6

The trick is to remove the ashtray to get better access and the trim is on simple clips so just carefully prise it up.

h7

Next job is to remove the ashtray assembly which is held in by two clips. Push these towards you on each side with a flat blade screwdriver.

7
h8

Behind this should be two screws securing the bottom of the centre console trim. Undo these as well.

8
h9

Now prise off the centre console trim to gain access to the two torx screws securing the stereo.

9
h10

Remove radio screws (Torx) on each side and take stereo out and disconnect aerial and ISO wiring plugs from back.

0 0 votes
Article Rating
Subscribe
Notify of
guest
0 Comments
Inline Feedbacks
View all comments